20 MINUTE BOW MAKING
INSTRUCTIONS
PLEASE UNDERSTAND I am making these instructions available for free.
USE THEM YOUR OWN RISK. I make NO claims for this design other than it
is fun, cheap and simple to make.
MATERIALS
Depending on your requirements the materials that are needed will be different.
You will need a piece of plastic tubing that will hold the size of solid fiberglass
rod that you intend to use. For a 40 - 45 pound pull bow you will need two pieces
of 5/16" by 48" solid fiberglass rod. These are sold in many home centers and
lumberyards. They are used as posts to hold driveway reflectors and are usually
about $2.50 each. I can supply you with 1/2" by 59" solid fiberglass rods for use
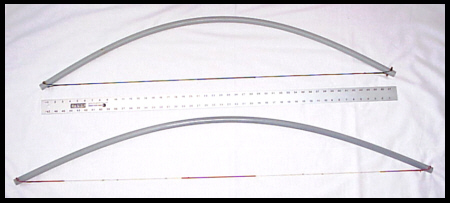
in the bows that pull around 50 pounds at 28". I use 1/2" gray electric conduit pipe
for the body of the bow. These are usually less than a dollar for a 10' piece and are
are 7/8" outside and 5/8" inside diameter. You will also need a roll of duct tape, a
saw, 1/4" hardwood dowel or 1/4" solid plastic rod and a 1/4" drill bit.
STEP 1
First determine what poundage of bow you wish to make. All steps will be the
same with the exception of how the fiberglass rods are prepared. Cut a piece
of the gray plastic pipe 3" to 4" longer than the fiberglass rod you are going to
use. Hold the pipe upright in one hand and place the other end on the floor. Push
down on the pipe and notice which way that it naturally bends. Do this several
times until you are sure and then mark the rod at both ends in line with the bend.
If you do not do this first step right you are in for problems.
STEP 2
Lay the fiberglass rod against the piece of pipe you have just cut. Center it on
the piece of pipe and place a mark at each end on the pipe. Drill a 1/4" hole at
a 90 degree angle to the mark you made for the bend in the pipe approximately
1/4" above the line you marked for the end of the fiberglass rod. Drill a second
hole at the opposite end in the same manner. Make sure to remove any burrs
from the hole on the inside and outside of the pipe. Take a file or some similar
tool and smooth the edges on each end of the pipe.
STEP 3
Now, take the fiberglass rod(s) and repeat the same procedure for bending as
you did the pipe. Mark the fiberglass rods so you know which way they bend
naturally. Now, If you are using two 5/16" rods, carefully lay them on a flat surface
so as the they both bend naturally in the same way. Cut some duct tape strips
about 5/8" in width. Tape the top and bottom sides of the 5/16" rods so they will
be taped together. DO NOT apply any tape to the sides. Make sure you have the
rods taped securely together. The rods will be a snug fit in the gray plastic pipe.
Slide the two rods in so that they are 90 degrees of the two drilled 1/4" holes.
make sure the rods are centered inside of the pipe. Check to make sure the 1/4"
holes are no blocked. If they are simply cut a small amount off of the rods to fit.
If you are going to use a single piece of 1/2" x 59" rod you need to wrap some
duct tape around the rod for a snug fit. I use 2" wide duct tape and go around
about 4 times. You need to do this on each end and then about ever 3" to 4"
until the rod is covered the full length. Also, if you cut the rod to about 56" you
can get two bows from one 10' piece of pipe. If you're making a child's bow you
can use one piece of the 5/16" rod. Wrap it with enough duct tape so that it will
not rattle around when placed in the pipe. You can also use 1/2" PVC water pipe
for a kids bow which smaller than the 1/2" gray electrical conduit.
STEP 4
Now cut two pieces of your hardwood dowel of similarly strong material about
2" in length. Rounds off the ends of each dowel so that they are smooth. Place
one piece in each of the drilled holes. These dowels serve 2 purposes. A place
for the string to catch on and to hold the rod(s) inside of the pipe in place. Now
make, buy or obtain a string. Place the string on the bow. The brace height is up
to you. You will need a nocking point. I place the nocking point about 2 inches
above center. Take the bow out and test it. USE COMMON SENSE - BE CAREFUL.
STEP 5
Once you are satisfied with everything you can now add a grip and finish the
bow. For an arrow rest you can use about what ever you want - plastic, leather
a piece of horn, whatever. Remember that this bow will bend the full length. You
use duct tape to build up the handle area or leather, fabric, etc. To cover the limbs
you can use magic markers, paint or camo tape. Do some testing on a scrap piece
of pipe before you get serious with the bow. Lightly sand the bow before applying
any paint or magic markers, etc. Scotchbrite works well.
SUMMARY
There are obviously many different ways to make these types of bows. You may
have easier ways of making string grooves as well. I developed this bow for
several reasons. I have made fiberglass backed bows, all wood laminated and
self bows as well. I'm getting older and a 50 pound bow is plenty for me to shoot
and have fun with. I can make one in about 20 minutes or less. It's virtually rain
and weather proof. I tested the gray pipe by leaving a piece out side for several
hours in a windchill of 20 degrees below - went out and bent it several times with
no damage. But as I stated - build these at your own risk.
The small rods can be purchased locally as stated. If you wish you can purchase
the 1/2" by 59" rods from me. The supplier only sells in bundles so I'm selling the
rods as priced on the bow page. Click here to return to the bow page.
Lot's of luck and have fun! I would appreciate in knowing about your success
on building these bows. Kids can have a lot of fun decorating these bows using
magic markers or paint.
Click on these links to view additional products.

MAKE YOUR OWN PEEL & STICK FABRIC

HOLOGRAPHIC BACKGROUND BUSINESS CARDS

CUSTOM WOOD LABELS   FABRIC BUSINESS CARDS

LEATHER BUSINESS CARDS   WOOD VENEER BUSINESS CARDS

APPLY METAL LEAF TO FABRICS    HEAT PRESSES

NOWAIT ADHESIVE    CUSTOM 6" RULERS
Dennis
Brooker - email - Phone 641- 533 - 2103
D. Brooker & Associates, 16283 - 425th St., Derby, Iowa 50068 USA
ALL PAGES, INFORMATION AND IMAGES ARE COPYRIGHT - DENNIS BROOKER 2003, 2004
RETURN TO
HOME PAGE